

Views: 0 Author: Site Editor Publish Time: 2025-09-17 Origin: Site


Do you want to pursue solar panel installation on your house? First, make a plan for how you will carry out the solar panel installation. Check with your HOA before you start. Get all the tools you need. Safety is very important. Be careful not to fall or get hurt by electricity. Lifting heavy things can also hurt you. Here are some common dangers:
Rooftops can be slippery and ladders can be risky
You can get shocked by live parts of the solar energy system
Lifting heavy panels can cause strains or sprains
Only about 4.96% of single-family homes in the United States have solar panels. You are joining a group that is getting bigger. DIY solar panel kits make it easier to handle the solar panel installation. But always ask a licensed electrician to do the final wiring. Haina will help you at every step!
Make a good plan before you install solar panels. This helps you avoid problems. Figure out how much energy your home uses. Look at your energy bills. Think about any changes you might need later. Ask your Homeowners Association (HOA) for permission before you start. Pick a DIY solar kit that matches your energy needs. Make sure it fits your roof. Get all the tools and safety gear you need before you begin. Find the best spot for your solar panels. This will help them get the most sunlight. Be careful and follow safety rules. This keeps you safe from falling or getting shocked. After you finish, test your solar panel system. Check to make sure everything works right.
Before you install solar panels, you need a solid plan. This step helps you avoid surprises and makes the solar panel installation process much smoother. Let’s break it down into three simple parts.
Start by figuring out how much electricity your home uses. Grab your recent energy bills and look for your yearly usage in kilowatt-hours (kWh). This number tells you how much power your solar energy system should produce. Think about your household size, how often you use heating or cooling, and if you have big appliances or an electric vehicle. Even your water heater and lighting can make a big difference.
Tip: If you plan to add more appliances or an EV soon, add that to your estimate. Planning for future needs helps you avoid outgrowing your system too quickly.
Here’s a quick checklist to guide you:
Review your energy bills for annual usage.
Count the people in your home.
List major appliances and how often you use them.
Consider heating, cooling, and water heating needs.
Think about future changes, like getting an EV.
If you live in a neighborhood with a Homeowners Association (HOA), you need to get their approval before you start. HOAs often have rules about solar panel installation. These rules can cover where you place panels, how they look, and even how many you can install.
Requirement Type | Description |
|---|---|
Prior HOA Approval | Submit your plans and specs for review before you install solar panels. |
Placement Restrictions | Some HOAs only allow panels on certain parts of your roof. |
Design and Aesthetics | Panels may need to match the look of your neighborhood. |
Size and Number Limits | There might be limits on how many panels you can install. |
Safety and Maintenance | You may need regular inspections and must follow building codes. |
Most HOAs want you to fill out an application. Sometimes, your contractor can help with the paperwork. Always wait for approval before moving forward.
Now comes the fun part—choosing your solar kit! Many people pick a DIY solar energy system because it saves money and gives you control. Here are some popular options for 2024:
EcoFlow Delta 1800 Complete Solar Panel Kit – Best overall, with 2,370 watts/day output and strong frames.
Bluetti AC200 MAX Nomad Kit – Great efficiency with three 200-watt panels.
Complete DIY Solar Panel Kit 400 Watts – Budget-friendly and easy to install.
EcoFlow Delta PRO HEX Kit – A complete system with an intuitive design.
Lion Safari ME GOLD Kit – Perfect for mobile setups and expandable up to 600 watts.
Note: Compare features, output, and price. Make sure your kit matches your energy needs and fits your roof space.
Once you finish these steps, you’re ready to move forward with your solar panel installation. Careful planning now will save you time and money later!
Getting ready to put up solar panels is important. You need to have all your things before you go on the roof. Let’s look at what you should do next.
You need the right tools and parts to do this job safely. Here is a simple checklist to help you:
Drills make holes in your roof.
Wrenches and screwdrivers hold brackets in place.
Use a level to keep brackets straight.
A tape measure helps you place things right.
Ladders or cranes help you lift panels.
Panel clamps hold the panels steady.
Ratchets and sockets tighten bolts and nuts.
Wire strippers and cutters get cables ready.
Crimping tools connect wires tightly.
A multimeter checks voltage and current.
You might already own some of these tools. If not, you can buy them at a hardware store. Check your solar kit for any special parts or connectors. If you forget a tool, it can slow you down. Lay out everything before you begin.
Scaffolding helps you reach the roof and keeps you safe. Here is how you can set it up for your project:
Pick independent scaffolding to reach all roof spots.
Use roofline scaffolding with guardrails near the edge. Guardrails keep you safe and follow rules.
For low roofs, use scaffolding that is steady and easy to move.
If it might rain, put up covers to keep your work area dry.
Scaffolding may seem hard, but it keeps you safer. Always check that it is strong before you climb. If you are not sure, ask a pro for help.
Safety is the most important thing when you put up solar panels. You want to stay safe from falls, shocks, and other dangers. Here is a quick guide to help you:
Safety Equipment | Function | Features |
|---|---|---|
Fall Protection Solutions | Stop falls | Guardrails, safety harnesses, lifelines |
Fire Extinguishers | Put out fires | Needs regular checks |
Smoke Detectors | Warn about smoke or fire | Early warning for escape |
Ground Fault Protection Devices | Stop ground faults | Stops electrical faults from spreading |
Safety Grounding Systems | Safe grounding | Protects people and equipment from surges |
You should also:
Wear gloves that protect from electricity.
Put on a suit that fits and keeps you safe.
Use a safety rope on the roof.
Make sure ladders are steady and at the right angle.
Carry panels with a friend to avoid getting hurt.
Learn how your solar system works and what to do if there is an emergency.
Ask a pro for help if you have questions.
Watch out for slips and trips, especially if the roof is wet or messy. Plan ahead and use the right safety gear to avoid accidents. You are almost ready to start putting up your solar panels!
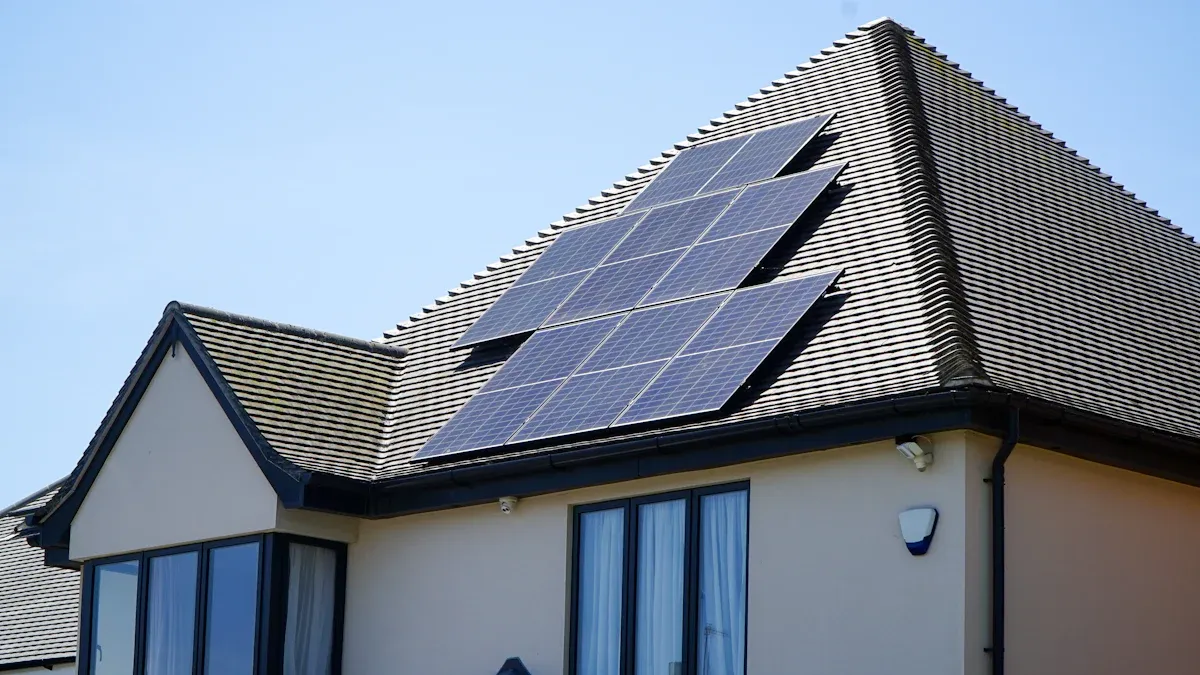
Picking the right spot for your solar panel mounts makes a big difference. You want your panels to get as much sunlight as possible. Here are some things you should look for when you choose a location:
Your roof needs to be strong enough to hold the panels and the mounting hardware. If you have an older roof, check for weak spots.
Look for areas with no shade from trees, chimneys, or nearby buildings. Shade can lower your solar panel output.
In the northern hemisphere, you should face your panels south. This direction gets the most sunlight during the day.
The tilt angle matters too. Try to match the angle of your panels to your city’s latitude. This helps you catch more sun all year.
Think about wind. Some roofs get strong gusts. Make sure your spot can handle wind pressure so your panels stay safe.
Arrange your panels in a way that avoids shading one panel with another. Good layout means better efficiency.
Leave enough space between panels. This makes it easier to clean and fix them later.
Tip: Use a solar pathfinder or a smartphone app to check sunlight hours for different spots on your roof. This helps you find the best place before you install solar panels.
Now you need to attach the mounts to your roof. The way you do this depends on your roofing material. Here are some common methods:
Use lag bolts, clamps, or other strong fasteners to hold the mounts in place. Pick the type that works best for your roof.
Mark and drill the attachment points based on your roof’s structure. Follow the instructions in your solar kit.
Choose fasteners that can handle local wind and snow loads. This keeps your panels safe during storms.
Add flashing and sealant around every spot you drill. This stops water from leaking into your roof.
Make sure each mount is tight and secure. Loose mounts can cause problems later.
Roofing Material | Fastening Method | Weatherproofing Steps |
|---|---|---|
Asphalt Shingle | Lag bolts, flashing | Use sealant under flashing |
Metal Roof | Clamps, bolts | Apply waterproof tape |
Tile Roof | Tile hooks, bolts | Seal around hooks and bolts |
Note: Always double-check that every penetration is sealed. Water leaks can damage your roof and your solar system.
If you feel unsure about drilling into your roof, you can ask a roofing expert for help. Taking your time with this step helps your solar panels last longer and work better.
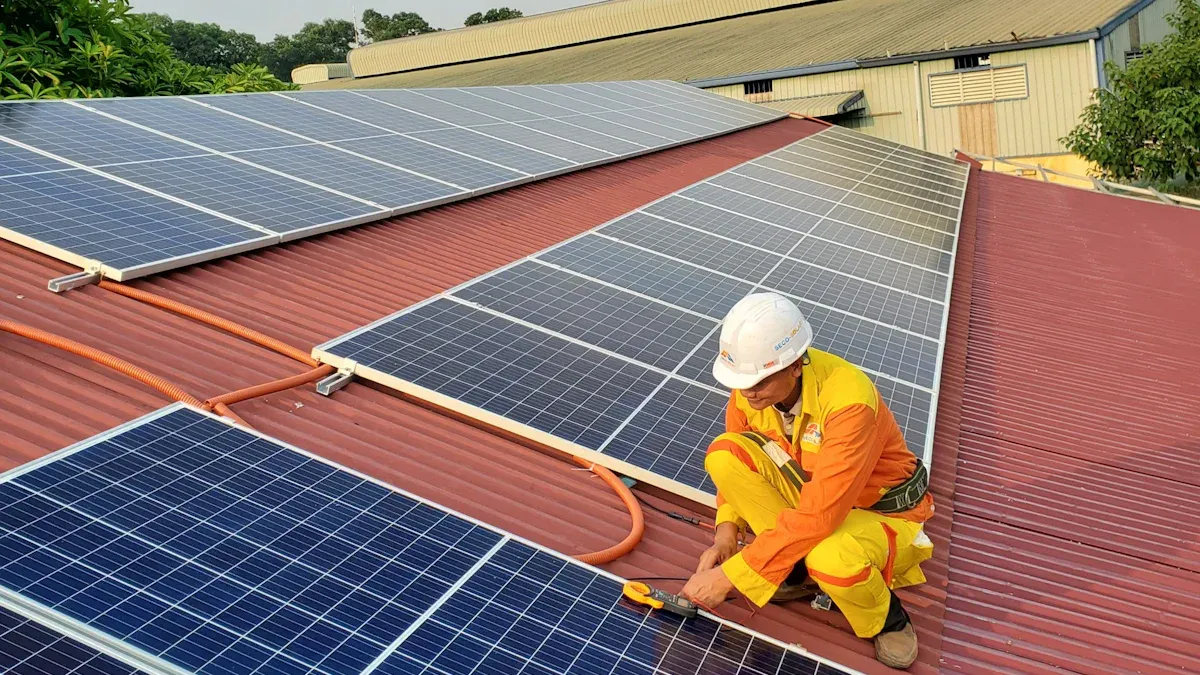
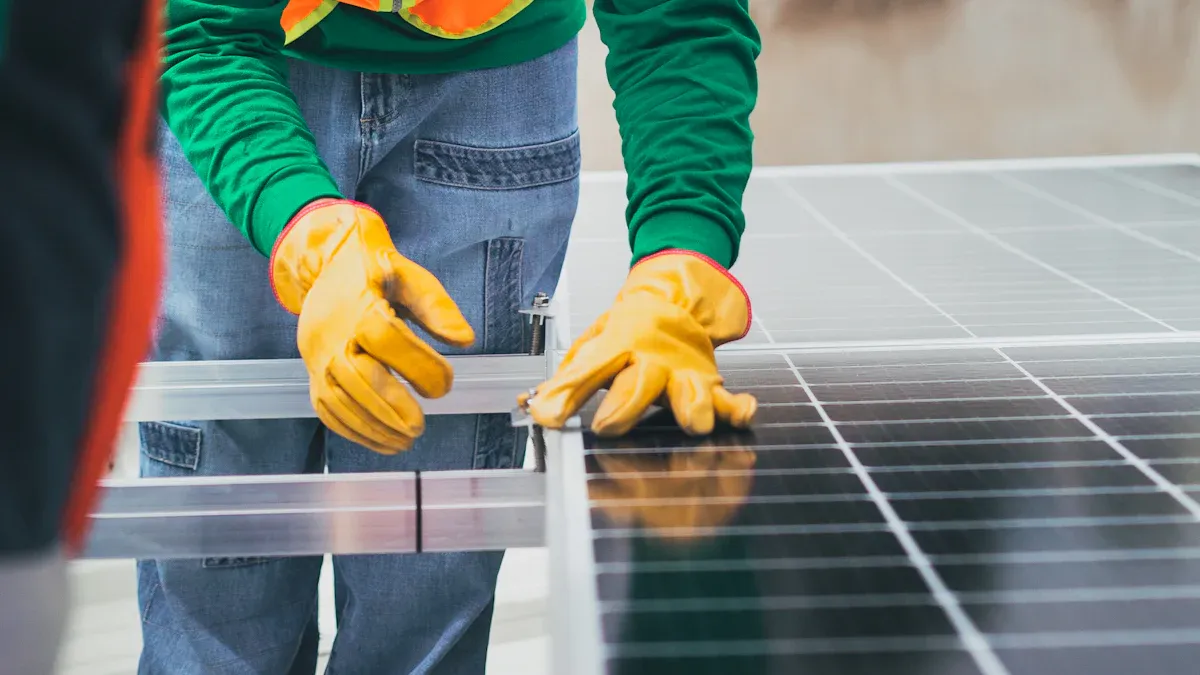
You have your mounts ready, so now it’s time to put the solar panels in place. This part feels exciting because you can see your project coming together. Let’s walk through the steps to make sure you do it right and keep everything secure.
Gather all your tools. Double-check your safety gear before you start. You want to avoid accidents.
Take the fixing bracket and line it up with the mounting holes on your solar panel. Make sure everything matches up.
Secure the fixing bracket to the panel’s mounting hole. Keep the alignment symmetrical so your panels sit straight.
Connect the other leg of the fixing bracket. Adjust it to get the tilt angle you want. Most people choose at least a 10-degree tilt for good sun exposure.
Attach the adjustable bracket to the fixing bracket. Check that the tilt angle is correct. This helps your panels catch more sunlight.
If you have more than one panel, connect them together. Leave enough space between each panel for airflow and easy cleaning.
Tip: Ask a friend to help you lift and position the panels. Solar panels can be heavy and awkward to handle alone.
When you install solar panels, take your time with each step. Rushing can lead to mistakes or damage. You want your panels to last for years.
Weather can be tough on solar panels. You need to protect your system from rain, snow, wind, and even hail. Good weatherproofing keeps your panels working and your roof safe.
Here’s a quick look at how different weather affects solar panels and what you can do:
Weather condition | Impact on solar panels | Suggested solution |
|---|---|---|
Extreme temperatures | Overheating panels can reduce system efficiency | Install high quality solar system components with proper ventilation |
Snow | Blocks sunlight and limits power generation | Wait for snow to melt or use a soft squeegee or brush for careful removal |
Hail | Risk of physical damage to panel faces | Choose high quality panels and install microinverters in high-risk areas |
Hurricanes | Damage from flying debris | Use hurricane-resilient mounting brackets and certified racking systems |
You can use several techniques to keep your solar panels and roof safe:
Install solar shingles if you want a tight roofing seal. These shingles remove the need for extra mounting parts.
Fix any roof leaks before you start. A damaged roof can cause problems later.
Add a waterproofing membrane under the mounts. This extra layer stops water from getting in and hurting your roof.
Use proper flashing methods around every mount. Flashing keeps moisture out and protects your home.
Note: Always check your panels and roof after storms. Quick repairs can prevent bigger problems.
Weatherproofing helps your solar panels work better and last longer. You protect your investment and keep your home safe.
Wiring your solar panels is a big part of the solar panel installation process. You need to make sure every connection is safe and follows the rules. This step makes your solar energy system work. Let’s look at how to do it in easy steps.
You must connect your solar panels before you can use their power. There are different ways to do this. Each way works best for certain setups.
Wiring in Series
Connect the positive side of one solar panel to the negative side of the next. Keep doing this until you finish the row. Then, connect the row to the inverter. This way makes the voltage go up.
Wiring in Parallel
Connect all the positive sides together. Connect all the negative sides together. Use an MC4 combiner for this step. Parallel wiring keeps the voltage the same but makes the current higher.
Wiring in Series-Parallel
First, wire groups of panels in series. Next, connect those groups in parallel with an MC4 T-Branch Connector. This setup balances voltage and current.
Tip: Turn off the main power before you start wiring. Check every connection twice to avoid mistakes.
You need to follow safety codes when you wire your solar energy system. Here are some important rules:
Compliance Aspect | Description |
|---|---|
National Electrical Code (NEC) | Gives rules for safe wiring and equipment, including solar panels. |
Local Building Codes | May have extra rules for spacing, access, and roof strength. |
Best Practices for Installation | Use the right wires, good insulation, and strong connections. |
Proper Wire Selection and Sizing | Pick wires that can handle the current without getting too hot. |
Effective Insulation and Protection | Protect wires from short circuits and weather. |
Connection Methods and Overcurrent Protection | Make sure connections are tight and use fuses or breakers to stop fires. |
Always follow the National Electrical Code (NEC).
Check your local building codes before you start.
Use the right size and type of wire for your system.
Insulate and protect every wire.
Make sure every connection is tight and safe.
⚠️ Safety Alert: If you feel unsure about any wiring, call a licensed electrician. This keeps you and your home safe.
The inverter is the heart of your solar energy system. It changes DC power from your panels into AC power for your house. There are a few types of inverters you can pick:
Type of Inverter | Advantages | Disadvantages |
|---|---|---|
String Inverters | Low cost; high efficiency; remote monitoring | High voltage risk; no panel-level monitoring; not good for shade; bulky |
Central Inverters | Low cost; high efficiency; easy to install | Large size; noisy; if it fails, the whole system stops |
Microinverters | Great for shade; lower voltage; panel-level monitoring; small | More complex; more maintenance |
Here is how you put in an inverter:
Choose a spot near your main electrical panel or outside your house.
Mount the inverter on a wall or strong surface.
Connect the wires from your solar panels to the inverter.
Add safety disconnects so you can turn off the system if needed.
Connect the inverter to your home’s power system.
After you finish, your system needs an inspection. Local officials and your utility company will check your work. When you pass, the utility company lets you turn on your solar panel installation.
Note: Only a licensed electrician should make the final connections to your home’s electrical panel. This step is not safe for DIY.
If you want to save extra power, you need batteries and a charge controller. Batteries let you use solar power at night or during blackouts. The charge controller keeps your batteries safe and healthy.
Battery Type | Average Lifespan |
|---|---|
Lithium-ion | 10-12 years |
Lead-acid | Less than lithium-ion |
Saltwater | Longer than lead-acid, shorter than lithium-ion |
Lithium-ion batteries last the longest, usually 10-12 years.
Lead-acid batteries cost less but do not last as long.
Saltwater batteries are safer and easier to recycle.
The charge controller is a key part of your solar energy system. It controls the flow of electricity from your solar panels to your batteries. It stops the batteries from getting too full or too empty. This helps your batteries last longer and keeps your solar panel installation working well.
The charge controller manages voltage and current.
It protects your batteries from harm.
It helps your solar energy system work better and last longer.
Tip: Always follow the instructions in your solar kit for battery and charge controller setup. If you have questions, ask a pro.
You have now finished the wiring and connections for your solar panel installation. You are one step closer to using clean, renewable energy at home!
You’ve finished setting up your solar panels, but you’re not done yet! Now it’s time to make sure everything works as it should. Testing and inspecting your diy solar panel installation helps you catch problems early and keeps your home safe.
You want your solar energy system to run smoothly from day one. Here’s a simple checklist you can follow:
Visual Inspection – Look at each panel for cracks, dirt, or anything that looks out of place. Clean off any dust or leaves.
Continuity Testing – Use a multimeter to check that all wires connect properly. This step helps you spot loose or broken wires.
Insulation Resistance Testing – Make sure no electricity leaks out where it shouldn’t. This keeps your system safe.
I-V Curve Tracing – Compare the power output of your panels to what the manufacturer says you should get. If the numbers match, you’re in good shape!
��️ Tip: Write down your results. You can use them later if you need to troubleshoot.
Sometimes things don’t go as planned. Don’t worry! Most issues have simple fixes. Here are some common problems and what you can do:
Improper Site Selection: If your panels don’t get enough sun, try moving them or trimming nearby trees.
Improvisation in Wiring: Never use makeshift fixes. Always use the right tools and connectors for safe wiring.
Misjudging Capacity Needs: If your system doesn’t meet your needs, check your energy use again. You might need to add more panels.
Neglecting Maintenance: Clean your panels and check for damage every few months. This keeps your system working well.
⚡ Note: If you ever feel unsure, call a professional. Safety comes first!
Before you flip the switch, do a final safety check. This step protects your home and everyone in it.
Electrical System: Check the main service panel, grounding, and all wire connections. Make sure everything matches local codes.
Structural Installation: Look at how the panels attach to your roof. They should feel solid and secure, ready for wind or storms.
Safety Labels: Every part of your system should have clear labels. These help emergency workers and make future repairs easier.
Take your time with this last step. Make sure all switches are easy to reach in case of an emergency. Double-check that your solar energy system can handle the weather in your area. When you finish, you can feel proud knowing your solar panels are safe and ready to power your home!
You now know the basic steps for solar panel installation. You should plan, check safety, do wiring, and inspect at the end. Always follow safety codes such as the National Electrical Code. Make sure you have the right skills before you start diy solar panel installation. If you make mistakes, repairs can cost a lot. Ask a certified installer for help if you need it. Careful research and good support help you save money on energy bills. You can also make your home worth more. Haina will help you through each step!
You can finish most DIY solar panel installations in one or two weekends. If you hire a professional, the job may take less time. Weather and roof size can change the timeline.
Yes, you need a permit in most places. You should check with your city or county office before you start. Permits help keep your solar energy system safe and legal.
You can install solar panels with a DIY kit. You must ask a licensed electrician to connect the system to your home’s power. This keeps you safe and follows local rules.
Most people save money on their electric bills every month. Your savings depend on your energy use, local rates, and sunlight. Some states offer rebates or tax credits.
Solar panels need little care. You should clean them a few times each year. Check for dirt, leaves, or snow. Inspect wires and mounts for damage.
Solar panels stop working if the grid goes down, unless you have a battery backup. Batteries let you use stored solar power when the grid is off.
You should fix your roof before you install solar panels. If you need repairs later, you may have to remove the panels first. This can cost extra.
Yes, you can add more panels. You should plan your system with extra space and capacity. This makes upgrades easier.


