

Views: 0 Author: Site Editor Publish Time: 2025-11-11 Origin: Site


You want the best solar setup for your home, but choosing a 10kW system takes more than guessing. Start by looking at your energy needs, then check if your roof suits the system. Compare different panels and their efficiency, pick a reliable inverter, and review warranties from trusted brands. Hire a certified installer, look at costs and financing, and make sure you get good after-sales support.
Tip: Many homeowners make mistakes like sizing the system wrong or picking the wrong panels. Avoid oversizing and always match your solar setup to your real energy needs.
Assess your energy needs
Check roof suitability
Compare panel types and efficiency
Select a quality inverter
Review warranties and brands
Choose a certified installer
Consider costs and financing
Ensure after-sales support
These steps will help you follow the best tips for choosing the best 10kW solar system for your home.
Look at your old electricity bills to see how much energy you use each month.
Make sure your roof is big enough for 25 solar panels. You need about 760 square feet of space.
Pick high-efficiency solar panels if your roof is small or has shade.
Choose a good inverter type for your roof. Microinverters work better if your roof has shade.
Get a certified installer to set up your system safely and correctly.
Check out ways to pay for your system and look for incentives. The federal solar tax credit can help lower your costs.
Read the warranty details to protect your solar system and make sure it works well for a long time.
Plan to take care of your solar system often so it keeps working well for many years.
You want to make sure your solar system matches your real energy needs. Start by looking at your electricity bills from the past year. This helps you see how much power you use each month and spot any patterns. Most homes that install a 10 kw solar system use about 30kWh each day, which adds up to around 900kWh every month. If your bills show numbers close to this, you’re on the right track.
Check your bills for the last 12 months.
Write down your highest and lowest monthly usage.
Notice if you use more power in summer or winter.
Tip: Your energy use can change with the seasons. You might run the air conditioner more in summer or use electric heating in winter. These changes affect how much energy your 10 kw solar system should produce.
Think about how your energy needs might change. Are you planning to buy an electric car or add a pool? Maybe your family will grow, or you’ll start working from home. These changes can increase your electricity use. It’s smart to plan for the future when you choose your solar system size.
List any big changes you expect in the next few years.
Decide if you want your 10 kw solar system to cover all your needs or just part of them.
A bigger solar system isn’t always better. If you install a 10 kw solar system that’s too large for your home, you might spend more money than you need. Oversizing can also mean you don’t get the best value from your investment. You want your solar system size to match your actual usage.
Solar panels make more energy on sunny days and less on cloudy ones.
Summer brings longer days and stronger sunlight, so your system produces more.
Winter has shorter days and weaker sunlight, which means less energy.
Note: Your solar system size should fit your lifestyle, not just your roof space.
Your daily habits matter. If you use most of your electricity during the day, a 10 kw solar system can help you save more. If you use power mostly at night, you might need to think about battery storage. Look at your routine and decide what works best for you.
Analyze your energy usage by checking your bills.
Think about how many hours of sunlight your home gets.
Decide if you want full coverage or just a partial offset.
Choosing the right solar system size means you get the most out of your investment. Take your time, look at your bills, and think about your future needs. A 10 kw solar system can be a great fit if your home uses about 900kWh each month and you want to cover most of your energy needs.
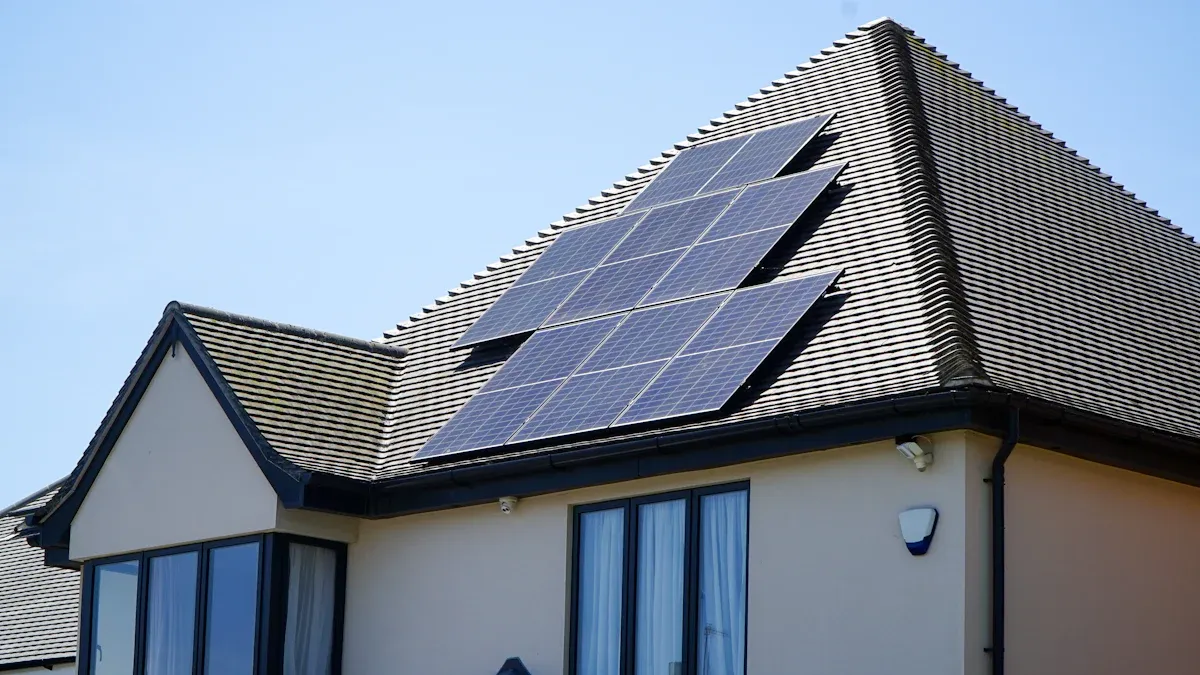
Before you jump into solar, you need to check if your roof has enough space. A 10kW solar system usually needs about 25 panels. Each panel takes up around 2 square meters. You should plan for a minimum of 70.56 square meters (about 760 square feet) of roof space. This includes extra gaps—about 40 centimeters around the edges and 3 centimeters between each panel. If your roof is smaller than this, you might need to look at a smaller system or consider high-efficiency panels.
You need at least 70.56m² (760 sq ft) of roof space for a 10kW system.
Each panel covers about 2m².
Leave a 40cm gap around the panels.
Keep a 3cm gap between each panel.
Tip: Measure your roof before you get quotes. This helps you avoid surprises and makes sure your installer can fit all the panels.
The way your roof faces and its tilt angle can change how much energy your solar panels make. South-facing roofs give you the best results. If your roof faces southeast or southwest, you still get almost all the power. East or west-facing roofs work, but you lose some efficiency. North-facing roofs make the least energy.
Orientation | Relative Energy Production |
|---|---|
South-facing | 100% |
Southeast/Southwest | 95-98% |
East/West-facing | 75-85% |
Northeast/Northwest | 60-75% |
North-facing | 45-60% |
The tilt of your panels matters too. Try to match the tilt angle to your latitude. If you live where it snows, a tilt of at least 30° helps snow slide off. Steeper angles (45-60°) shed snow even better, but you might lose some summer performance.
Match panel tilt to your latitude for best year-round results.
Use at least a 30° tilt in snowy areas.
Steep angles shed snow but may lower summer output.
Note: Good orientation and tilt help you get the most energy from your solar system.
Shading can cut your solar power by half or even more. You need to look for anything that blocks sunlight from hitting your panels. Common sources include trees, nearby buildings, antennas, and poles. Sometimes, panels shade each other if rows are too close. Hills or tall terrain can also block the sun, especially in the morning or evening.
Watch out for trees, buildings, antennas, and poles.
Check for self-shading from other panel rows.
Look for hills or terrain that block sunlight.
Dirt or aging panels can also lower output.
Even a small shadow can cause a big drop in power. Studies show that if just one cell gets shaded, you could lose up to 50% of your system’s output. In some cases, the loss can reach 80%. So, make sure your roof gets clear sunlight most of the day.
Tip: Walk around your house at different times to see where shadows fall. This helps you spot problems before you install your panels.
Picking solar panels and brands can be confusing. You want good value and panels that last a long time. Let’s look at the main tips for picking the best 10kW solar system for your house.
You will find two main panel types for a 10kW system. Monocrystalline panels use pure silicon and look black. Polycrystalline panels use mixed silicon and look blue. Monocrystalline panels work well in small spaces and are more efficient. Polycrystalline panels cost less but do not work as well in tight areas.
Here is a simple chart to compare them:
Type of Solar Panel | Efficiency Range |
|---|---|
Monocrystalline | 17% to 22% |
Polycrystalline | 15% to 17% |
Thin-film | 10% to 13% |
Monocrystalline panels give you more power from less space. Polycrystalline panels save you money at first. If you want the most efficient system, monocrystalline panels are usually best.
Thin-film panels are another choice. They are light and bend easily, so they fit odd-shaped roofs. Thin-film panels are not as efficient as the other types. You need more panels and more space to reach 10kW. Most people do not pick thin-film unless their roof cannot hold regular panels.
Tip: If your roof is small or has shade, monocrystalline panels work best. Thin-film panels are good for sheds or garages but not for most homes.
Solar panels work best when it is cool outside. When it gets hot, panels lose some power. The heat coefficient shows how much power drops for each degree above 25°C. Most panels lose between 0.2% and 0.5% for every degree. On hot days, you might lose up to 25% of your power. If you live somewhere warm, pick panels with a low heat coefficient.
The average heat coefficient is -0.2% to -0.5% per degree Celsius.
Hot weather means less power from your panels.
Some panels handle heat better than others.
Note: Ask your installer about the heat coefficient before buying. This helps you choose panels that work well even when it is hot.
Solar panels slowly lose power over time. This is called degradation. Panels with low degradation rates keep making more energy for longer. If you want to save money for many years, pick panels with slow degradation.
Solar panel degradation means less power each year.
Higher degradation rates mean less energy over time.
This affects how much money you save with solar.
Here is what you can expect:
Degradation Rate | Energy Loss Over 25 Years |
|---|---|
1% first year, 0.25% subsequent | 92% of original output remaining |
Panels with low degradation rates help you get the most from your system. You will get better returns and steady power for years.
Tip: Always check the manufacturer’s data sheet for degradation rates. This is one of the most important tips for picking the best 10kW solar system for your home.
Not all brands are the same. Some companies make panels that last longer and work better. Others focus on low prices. You want a brand with good reviews and a strong reputation. Here are some top picks for 10kW systems:
Brand Name | Key Features |
|---|---|
Maxeon | Premium efficiency and unmatched warranty coverage |
REC Alpha Pure | Optimal performance per dollar spent |
Aiko Solar | Maximum power density |
JA Solar | Reliable performance at competitive pricing |
Jinko Solar | Maximum output per panel |
You may also hear about:
Canadian Solar: Reliable and affordable panels.
JA Solar: High performance at low prices.
Qcells: Good quality and fair pricing.
Silfab Solar: Trusted by installers for many years.
Jinko Solar: Low prices and dependable panels.
Tip: Read customer reviews online. Ask your installer which brands they trust. This helps you avoid problems and pick the best solar system for your home.
Warranties protect your solar investment. Top brands offer strong coverage for panels, inverters, batteries, and installation. Here is what you should look for:
Component | Warranty Duration |
|---|---|
Solar Panels | 25-30 years |
Inverters | 10-12 years (extended available) |
Batteries | 10 years (or cycles) |
Workmanship | 10 years |
A long warranty means the company stands behind its product. If something breaks, you get repairs or replacements. Always read the details. Some warranties cover only parts, while others include labor.
Note: Warranty terms are one of the most important tips for picking the best 10kW solar system for your home. Make sure you know what is covered before you sign.
Now you know the main tips for picking the best 10kW solar system for your home. Compare panel types, check efficiency and degradation, pick a trusted brand, and review warranty terms. These steps help you get the most value and peace of mind from your solar investment.
Picking the right inverter is very important. The inverter changes solar power into electricity for your home. You can choose between string inverters and microinverters. Both types have good and bad points.
Here are the main differences between string inverters and microinverters. This table helps you compare them:
Feature | Microinverters | String Inverters |
|---|---|---|
Installation Location | Attached to the underside of each panel on the roof | Installed at ground level, often next to the electric panel |
Cost | Generally higher due to more equipment required | Typically lower upfront cost |
Reliability | If one fails, others continue to operate | Single point of failure; if it fails, the whole system stops |
Performance | Shade affects only the covered panels | Performance limited by the weakest panel in the string |
Monitoring | Panel-level monitoring available | Total system output monitoring, unless power optimizers are used |
Scalability | Easier to add panels without affecting the system | May require new equipment or inverter upgrades to add panels |
Microinverters go under each solar panel on your roof. If one breaks, the rest keep working. Shade only lowers power for the shaded panel. You can check how each panel is doing. Microinverters cost more and need extra parts. It is easy to add more panels later.
String inverters stay on the ground near your electric panel. They cost less and are simple to put in. If one panel has trouble, the whole system slows down. If the inverter breaks, all panels stop working. You see the total power, not each panel’s output.
Tip: Microinverters are best if your roof has shade or you want to watch each panel. String inverters are good if you want to save money and your roof gets lots of sun.
Your inverter should match your solar panels and your home. Here are some ways to make sure everything fits:
Pick panels that work well and give enough power.
Choose panels with a long warranty, like 25 years.
Think about both price and quality before you buy.
Make sure your panels fit your roof and work with your home’s wires.
Look for new features that help save energy and money.
Ask your installer if the inverter works with your panels. Some brands work better together. If you want more panels later, check if your inverter can handle them.
Note: Making sure everything matches helps your system work well and saves you problems later.
Your inverter should last as long as your panels. Most inverters come with a warranty for 10 to 12 years. Some brands let you pay for longer coverage. A good warranty means the company trusts its product. If your inverter breaks, you get repairs or a new one.
Microinverters often have longer warranties than string inverters.
Reliable inverters keep your solar system working well.
Always read the warranty before you buy.
If you pick a trusted brand and check the warranty, your system will work better and have fewer problems. Your solar system will power your home for many years.
Tip: Ask your installer about warranty and reliability before you choose. This helps you pick the best inverter for your 10kW solar system.
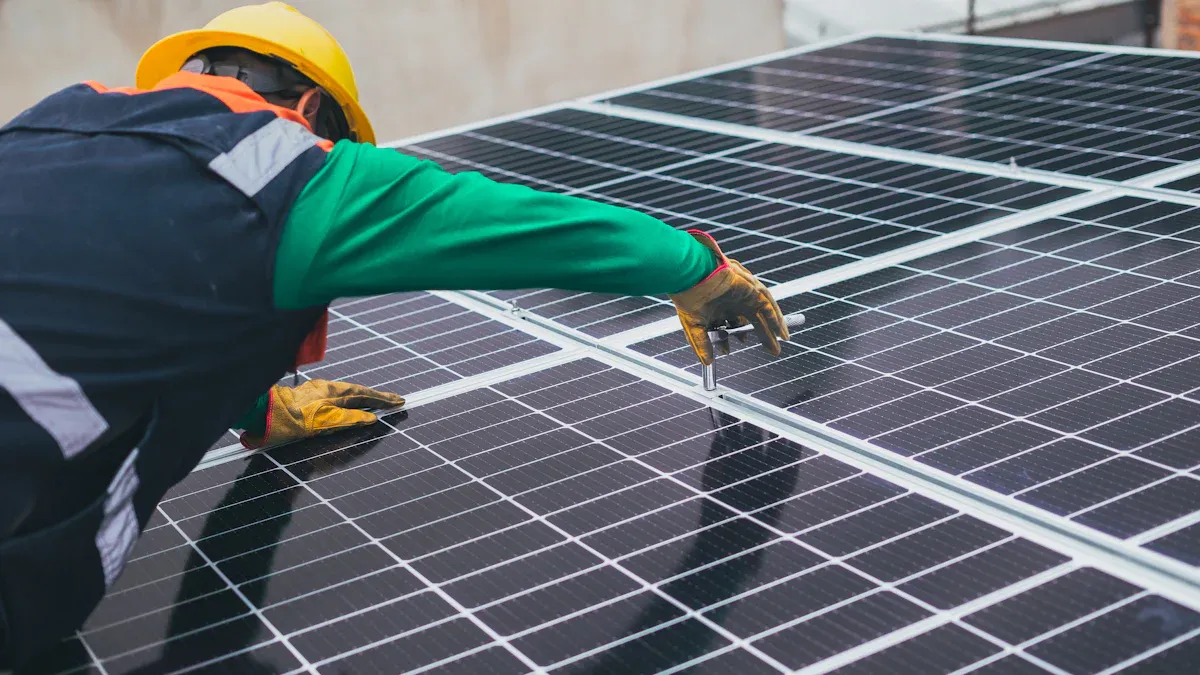
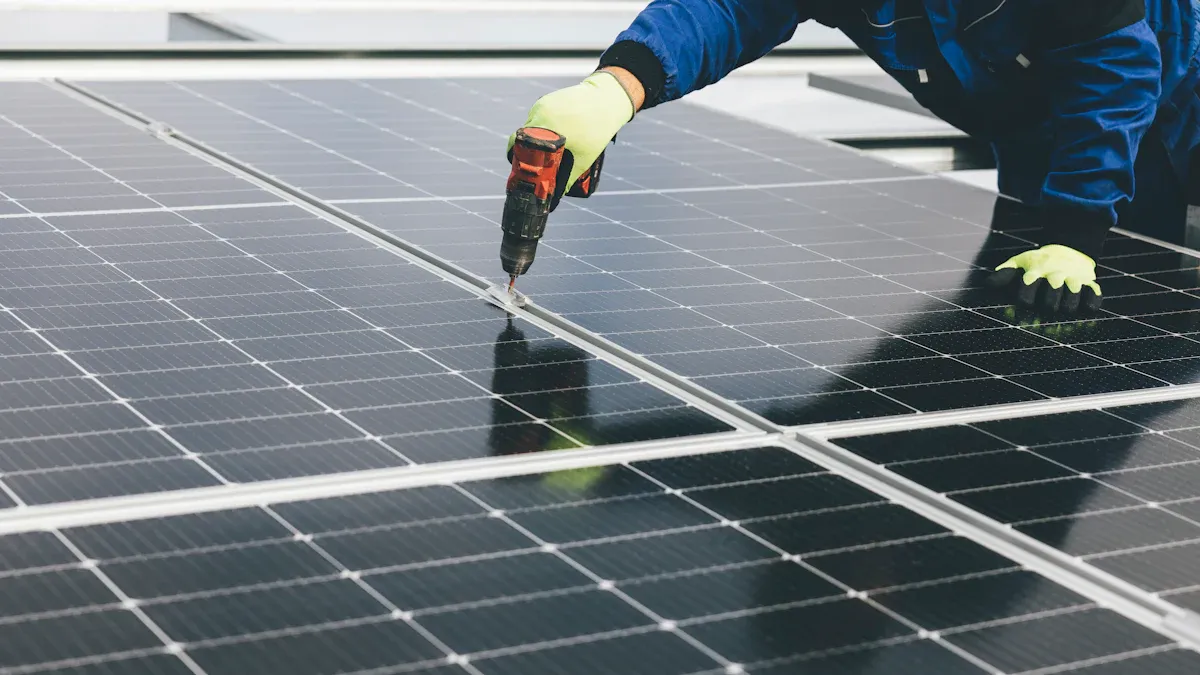
Picking the right team matters a lot. You want your 10kW system to be safe and last long. Certified professionals know what they are doing. Let’s see why hiring them is important and what you should know before trying it yourself.
Always check if your installer has the right certificates. Certified installers get special training for big jobs like 10kW solar panel installation. They follow safety rules and know local laws. Here are some top certificates to look for:
Certification Name | Training Hours | OSHA Requirement | Validity Period |
|---|---|---|---|
ETA-I Certification | 40 | No | 4 years |
NABCEP Installation Professional | 58 | Yes | 3 years |
ETA Photovoltaic Installer – Level 2 | 60 | Yes | 4 years |
Installers with these certificates know how to size your system. They place panels for the best sunlight. They connect everything safely. You can relax knowing your solar panel installation meets the rules.
Tip: Ask your installer to show their certificates. Make sure they have experience with 10kW systems. This helps you avoid mistakes that cost money.
You might want to install your solar panels yourself. It can save money at first. You might feel proud doing it. But a 10kW system is big and hard to set up. Let’s compare doing it yourself and hiring a pro:
Aspect | DIY Installation | Professional Installation |
|---|---|---|
Safety Risks | Higher risk of electric shocks and falls | Adheres to safety protocols and has liability insurance |
Warranty Issues | May void warranties if not installed correctly | Maintains warranty coverage with certified installation |
Technical Expertise | Requires significant knowledge and skills | Specialized expertise ensures optimal performance |
Upfront Costs | Generally lower upfront costs | Higher upfront costs but includes warranty and support |
Administrative Support | Homeowner must handle permits and inspections | Professional installers manage all administrative tasks |
Pros of DIY Installation:
You might save money.
You feel proud of doing it yourself.
Cons of DIY Installation:
It takes a lot of time and effort.
You could lose your warranty.
Mistakes can lower your system’s efficiency.
Pros of Professional Installation:
Experts know how to get the job done right.
Your warranty stays safe.
Installers handle permits and inspections.
Cons of Professional Installation:
You pay more up front.
You have less control over the process.
Professional installers make sure your solar panel installation is done right. They follow safety rules and use their skills to avoid problems. You get better results and fewer worries.
Note: For a 10kW system, hiring pros is the safest and smartest choice. You protect your money and get the most energy from your panels.
When you look at a 10kW solar system, you want to know what you’re paying for. The total cost includes equipment, labor, and permitting fees. On average, you’ll spend about $29,500 for everything. Here’s a quick breakdown:
System Size | Total Cost |
|---|---|
10 kW | $29,500 |
The price can change depending on where you live. Some states have lower costs because there’s more competition or easier rules. Take a look at how much you might pay per watt in different regions:
Region | Average Cost per Watt |
|---|---|
Arizona | $2.04 |
Texas | $2.13 |
Nevada | $2.18 |
Florida | $2.53 |
Wyoming | $3.54 |
Hawaii | $3.37 |
Tennessee | $3.36 |
Massachusetts | $3.04 |
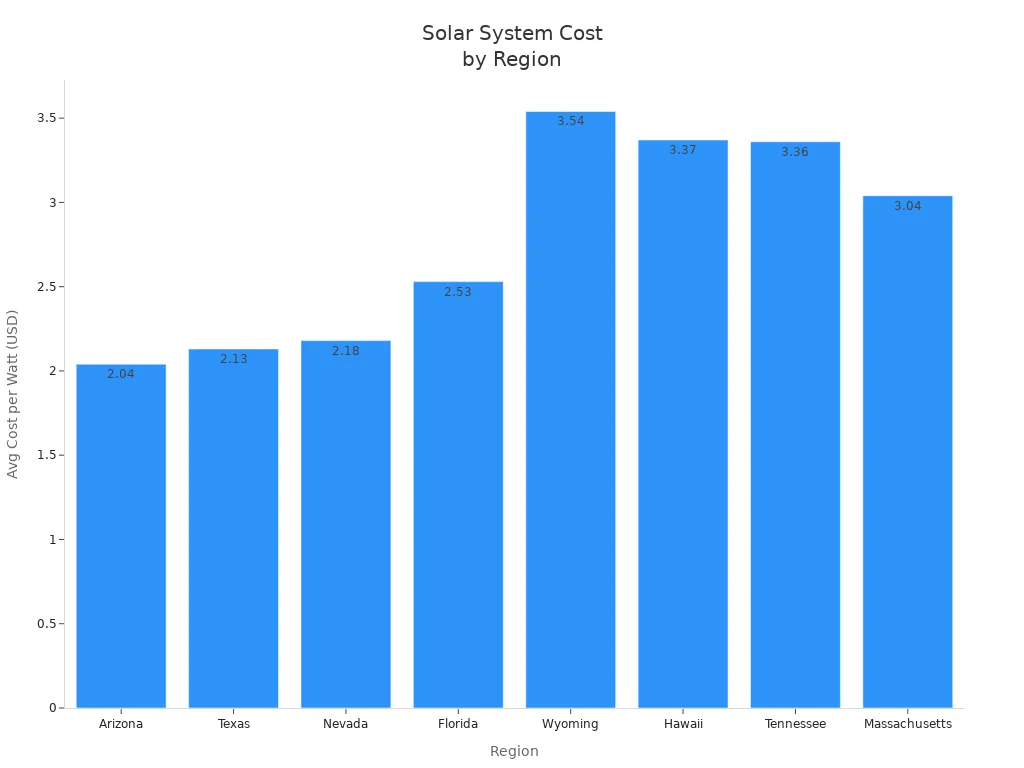
Tip: Costs go up in places with higher wages, tough permitting, or fewer installers. If you live in a state with lots of solar companies, you might get a better deal.
Permitting fees add to your total cost. Some cities make you pay more because they have strict rules. If your area has simple approval steps, you save money. Always ask your installer about these fees before you sign anything.
You can lower your solar costs by using incentives and rebates. The federal solar tax credit gives you a 30% discount on your total system price. If you install your system in 2025, you get this credit. Many states also help you save:
The federal solar tax credit covers 30% of your installation cost.
Some states waive sales tax on solar systems.
Property tax exemptions help you avoid higher taxes from your new solar panels.
State rebates give you cash back after you install your system.
Note: The federal solar tax credit is one of the best ways to cut your costs. Ask your installer how to claim it and check if your state offers extra savings.
You don’t have to pay for your solar system all at once. Many people use loans, leases, or special agreements. Here’s a table to help you compare:
Financing Option | Description | Benefits |
|---|---|---|
Solar Loans | Loans for solar installations, flexible terms. | Flexible terms, pay over time, own your system. |
Solar Leases | Rent your solar system, pay a fixed monthly fee. | No maintenance costs, low upfront cost, steady payments. |
Power Purchase Agreements | Buy electricity from your panels at a set price. | No upfront cost, lower bills, no maintenance worries. |
Government Incentives | Federal and state programs to lower costs. | The federal solar tax credit and state rebates reduce what you pay. |
Tip: The federal solar tax credit works with loans, leases, and agreements. You can use it to save money no matter how you pay for your system.
If you want to own your system, a solar loan lets you spread payments over several years. Leases and power purchase agreements help you avoid big upfront costs. You still get the benefits of solar power and the federal solar tax credit.
You want your 10kW solar system to work well for a long time. After-sales support and regular maintenance help you get the most from your system. Let’s see what you can expect and what you should do.
Good solar installers help you after your system is set up. You don’t have to do everything by yourself. Here are some things companies offer:
Service Type | Description |
|---|---|
Alert management | They watch for alerts and fix problems quickly. |
Visual Inspection | They check your system often to find issues early. |
System testing | They test your system to make sure it works right. |
Proactive daily system monitoring | They look at your system every day to catch small problems. |
Detailed annual preventative maintenance report | They give you a yearly report about your system’s health. |
OEM liaison | They talk to the equipment maker if you need help or parts. |
Routine preventative maintenance | They visit on a schedule to keep things working well. |
Monthly or quarterly production reports | They send updates about how much energy you make. |
Tip: Ask your installer what support they give you. Ongoing help can save you time and money.
You don’t need to be an expert to care for your system. Most jobs are easy, but some need a professional. Here are the main things to remember:
Maintenance Practice | Description |
|---|---|
Cleaning solar panels | Wash panels with a soft brush and gentle soap to remove dirt. |
Inspecting connections | Have a licensed pro check wires and connections for safety. |
Monitoring performance metrics | Watch your system’s energy output to spot drops. |
Conducting regular inspections | Look for cracks or loose parts every few months. |
Ensuring safety during maintenance | Always let a pro handle electrical work and turn off the system first. |
Clean panels make more power. Dust or bird droppings can block sunlight and lower energy. Clean your panels once or twice a year. If you live in a dusty place, clean them every few months. Use a soft brush and gentle soap. Don’t use strong chemicals.
Maintenance Type | Frequency |
|---|---|
Cleaning Panels | 1-2 times per year (quarterly in dusty areas) |
Monitoring Display Panel | Check often for error messages |
Visual Inspection | Every few months |
Professional Inspection | Once a year |
Check your system’s display panel for error messages. If you see something strange, call your installer. A yearly professional inspection helps find problems you might miss.
Note: Cleaning and checking your system often keeps it working well.
Sometimes things break, even if you take care of your system. If you need to use your warranty, follow these steps:
Look at your warranty papers to see what is covered.
Write down the problem and call your installer first.
If your installer can’t fix it, contact the manufacturer.
Send any papers or photos they ask for.
Wait for their review and do what they say.
The manufacturer will fix, replace, or refund as needed.
If you keep good records and act fast, you get help sooner. Don’t wait if you see a problem.
Taking care of your 10kW solar system is not hard. With good support and a little effort, you will enjoy clean energy and peace of mind for many years.
You want the best deal for your 10kW solar system, so don’t settle for the first offer. Get quotes from at least three companies. Ask each one about their prices, payment plans, and any discounts. Some companies offer free home consultations, which helps you understand what fits your roof and budget. Always check the warranties. Look for at least a 10-year warranty, but many top brands give you up to 25 years.
Here’s a quick table to help you compare quotes:
Factor | Description |
|---|---|
Solar costs and financing | Different companies offer various financing options; compare prices and payment plans. |
Free Home Consultations | Obtain quotes from at least three companies to compare prices and inquire about discounts. |
Warranties on Solar Systems | Ensure the solar panels have at least a 10-year warranty, with many companies offering up to 25 years. |
Tip: Don’t just look at the lowest price. A better warranty or higher efficiency can save you more money over time.
Now, take a step back and look at the big picture. Cost matters, but it’s not the only thing. You want a system that gives you the best value for years to come. Here’s how the main costs break down:
Factor | Cost Range | Details |
|---|---|---|
Solar Panels | $7,500 – $20,000 | 45–60% of total cost; price varies with type, efficiency, and brand; higher efficiency gives better long-term savings. |
Inverters | $2,250 – $5,000 | Converts DC to AC; 15–25% of total cost; options include string, micro, and hybrid inverters. |
Labor and Installation | $6,000 – $10,000 | Costs vary with location and complexity; includes physical setup and electrical work. |
When you review your options, keep these points in mind:
Efficiency affects your savings over time.
Higher efficiency panels can boost your energy production.
A strong warranty shows the company trusts its product and will help if something goes wrong.
Note: Don’t rush. Take your time to weigh cost, efficiency, and warranty. The right balance gives you peace of mind and steady savings.
You’ve picked your system and signed the contract. Now, get your home ready for installation. Follow these steps to make sure everything goes smoothly:
Make sure the installation area has good airflow. This keeps your system cool and working well.
Hire a CEC-accredited electrician to handle the AC wiring. They will connect your inverter to your home’s electrical panel safely.
Ask your installer to run initial system tests. This checks all the electrical connections for errors.
Follow a safety checklist. Wear protective gear, check for electrical safety, and use fall protection if anyone works on the roof.
Plan for routine inspections. Clean your solar panels at least twice a year to keep them efficient.
Getting ready for installation helps your system last longer and work better. A little prep now saves you headaches later.
You’re almost there! With careful planning and the right choices, your 10kW solar system will power your home for years to come.
You want the best solar system for your home, so focus on what matters most. Check your roof space and make sure you have enough room for panels. Look at your energy habits and think about how much power you use each day. Review your budget and see what incentives can help you save. Ask a professional for advice and get a custom plan. Use these tips to make a smart choice and enjoy clean energy for years.
Roof space requirements
Energy consumption patterns
Budget considerations
Professional assessment
You need about 760 square feet for a 10kW system. Most homes use around 25 panels. Measure your roof before you start. If your roof is small, ask about high-efficiency panels.
A 10kW system usually covers most or all of your needs if you use about 900kWh each month. Check your electricity bills to see if this matches your usage.
Most installers finish in one to three days. The process includes setup, wiring, and testing. Weather or permit delays can add time.
Clean your panels once or twice a year. Check for dirt, leaves, or bird droppings. Schedule a yearly inspection with your installer to keep everything working well.
Yes, you can add batteries later. Many systems let you upgrade when you want more backup power. Ask your installer about battery-ready options.
If a panel fails, your system keeps running. Microinverters help limit power loss to just one panel. Call your installer for repairs. Most panels come with long warranties.


